Как проверить баланс карты Связь-Банка
Хочешь всегда знать, сколько денег на карте Связь-Банка? Рассказываем о самых удобных способах проверить баланс карты Связь-Банка – онлайн, по телефону и даже в SMS!
В современном мире, когда цифровые технологии прочно вошли в нашу жизнь, вопрос оперативного контроля за своими финансами становится особенно актуальным. Проверка баланса карты Связь-Банка – это не просто удобство, это необходимость для эффективного управления личными средствами. Знание текущего состояния счета позволяет планировать расходы, избегать неприятных сюрпризов и контролировать все транзакции. Существует несколько простых и доступных способов узнать баланс карты Связь-Банка, каждый из которых имеет свои преимущества.
Основные Способы Проверки Баланса
Существует несколько способов, позволяющих быстро и удобно узнать остаток средств на вашей карте Связь-Банка. Рассмотрим самые популярные и эффективные из них:
Интернет-Банкинг
Самый удобный и современный способ – это использование интернет-банкинга. Для этого необходимо зарегистрироваться в личном кабинете на сайте Связь-Банка и получить доступ к информации о своих счетах. Преимущества этого способа очевидны:
- Доступность в любое время суток из любой точки мира.
- Возможность просмотра истории операций.
- Удобный интерфейс и простота использования.
Мобильное Приложение
Мобильное приложение Связь-Банка – это отличная альтернатива интернет-банкингу. Оно позволяет проверять баланс, совершать переводы и оплачивать услуги прямо со смартфона. Основные преимущества:
- Быстрый доступ к информации о счете.
- Удобство использования в мобильных условиях.
- Push-уведомления о транзакциях.
Банкоматы Связь-Банка
Проверить баланс можно и через банкоматы Связь-Банка. Для этого необходимо вставить карту в банкомат, ввести ПИН-код и выбрать соответствующую опцию в меню. Этот способ подходит для тех, кто предпочитает традиционные методы.
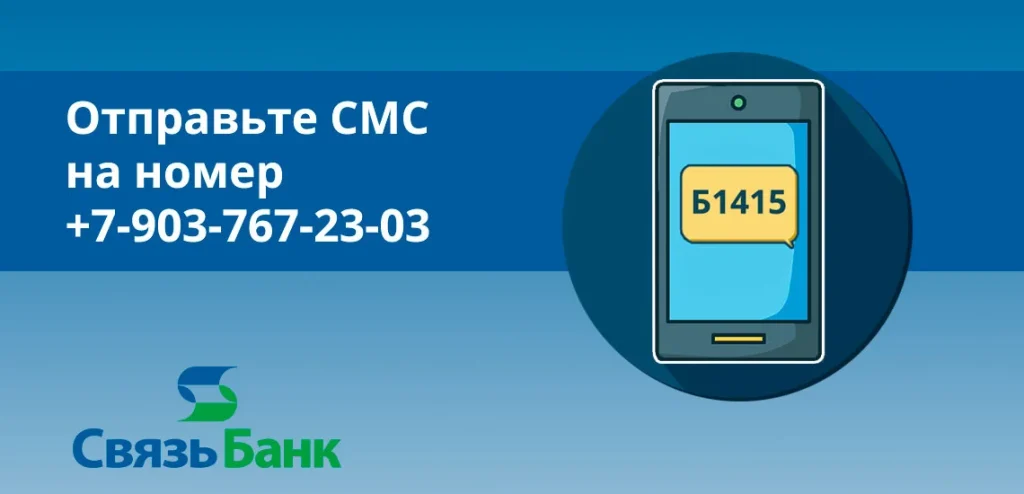
Телефон Горячей Линии
Если у вас нет доступа к интернету или банкомату, вы всегда можете позвонить на горячую линию Связь-Банка. Оператор попросит вас предоставить данные карты и идентифицировать себя, после чего сообщит текущий баланс.
Сравнительная Таблица Способов Проверки Баланса
| Способ | Преимущества | Недостатки |
|---|---|---|
| Интернет-Банкинг | Доступность, история операций, удобство | Необходимость регистрации, требуется доступ к интернету |
| Мобильное Приложение | Быстрый доступ, удобство, push-уведомления | Требуется смартфон, доступ к интернету |
| Банкоматы | Традиционный метод, не требуется интернет | Необходимость поиска банкомата, ограниченная доступность |
| Горячая Линия | Доступность без интернета и банкомата | Необходимость идентификации, ожидание ответа оператора |